CocoaPods
Learn how to add Shake to your iOS app using CocoaPods.
You're viewing the iOS docs. Other platforms → Android React Native Flutter Web Chrome extension�
Not using CocoaPods yet? Follow their brief installation guide,
then run pod init in the root of your project and you're done — let's move on.
Shake SDK is distributed as a binary package, more specifically an XCFramework. CocoaPods added support for XCFrameworks in the 1.9 beta release, so make sure your CocoaPods installation is running with version no lower than 1.9.
Create a new app on Dashboard
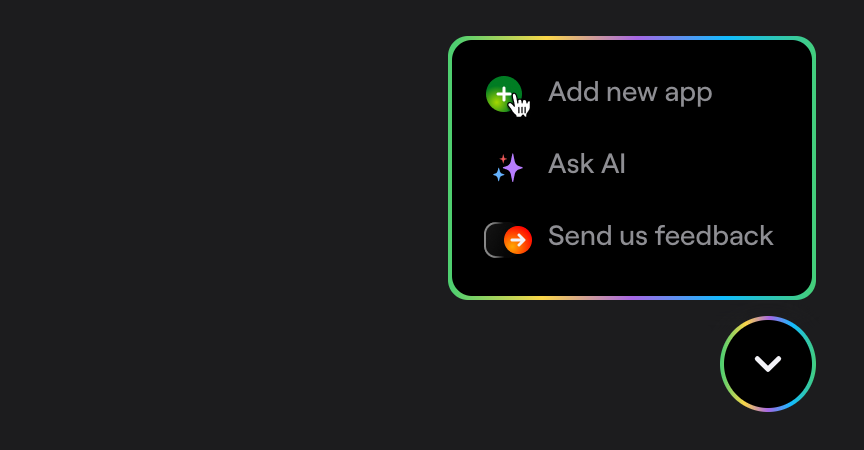
Visit your Shake Dashboard and add a new Native iOS app by clicking the Add new app button located in the bottom right corner.
Once you're done, you're ready to proceed with the steps below.
Add Shake to your Podfile
- Objective-C
- Swift
pod 'Shake'
use_frameworks!pod 'Shake'
Then, run the pod install command in your terminal.
After the installation also run pod update Shake to be perfectly sure that you're using the latest Shake .
Initialize Shake
Initialize Shake in the didFinishLaunchingWithOptions callback of your AppDelegate.
Make sure that your iOS application bundleId matches the application bundleId saved in the Shake dashboard.
Replace app-api-key with the actual value you have in your app settings:
- Objective-C
- Swift
#import "AppDelegate.h"@import Shake;@implementation AppDelegate- (BOOL)application:(UIApplication *)application didFinishLaunchingWithOptions:(NSDictionary *)launchOptions {[SHKShake startWithApiKey:@"app-api-key"];return YES;}@end
import UIKitimport Shake@UIApplicationMainclass AppDelegate: UIResponder, UIApplicationDelegate {func application(_ application: UIApplication,didFinishLaunchingWithOptions launchOptions: [UIApplicationLaunchOptionsKey: Any]?) -> Bool {Shake.start(apiKey: "app-api-key")return true}}
Some of the Shake features use swizzling.
To avoid swizzling conflicts, call Shake.start() before initializing other frameworks.
Build and run your project by selecting Run → Run in the menu bar.
Conditional initialization
We recommend initializing Shake in the entry point of your app. However, depending on your app, you'll want to initialize Shake just in a specific conditions, depending on your app data. You can do it as shown in the example below when your app data is available:
- Objective-C
- Swift
#import "Main.h"@import Shake;@implementation MainVC- (void)viewDidLoad {[super viewDidLoad];if ([User isTester]) {[SHKShake startWithApiKey:@"app-api-key"];}}
import UIKitimport Shakeclass MainVC: UIViewController {override func viewDidLoad() {super.viewDidLoad()title = "Main"if User.isTester() {Shake.start(apiKey: "app-api-key")}}}
Visit your Shake dashboard
Follow the instructions there to send your first feedback with Shake and you're all set.
SDK customizations
Now that Shake SDK is in your app and you have sent the first feedback for fun, everything else is optional. As the next step, try the three most popular SDK customizations:


