Shake UI
Shake's user interface explained and instructions on how to customize it.
You're viewing the Web docs. Other platforms → iOS Android React Native Flutter
Screens
The Shake UI consists of several different screens:
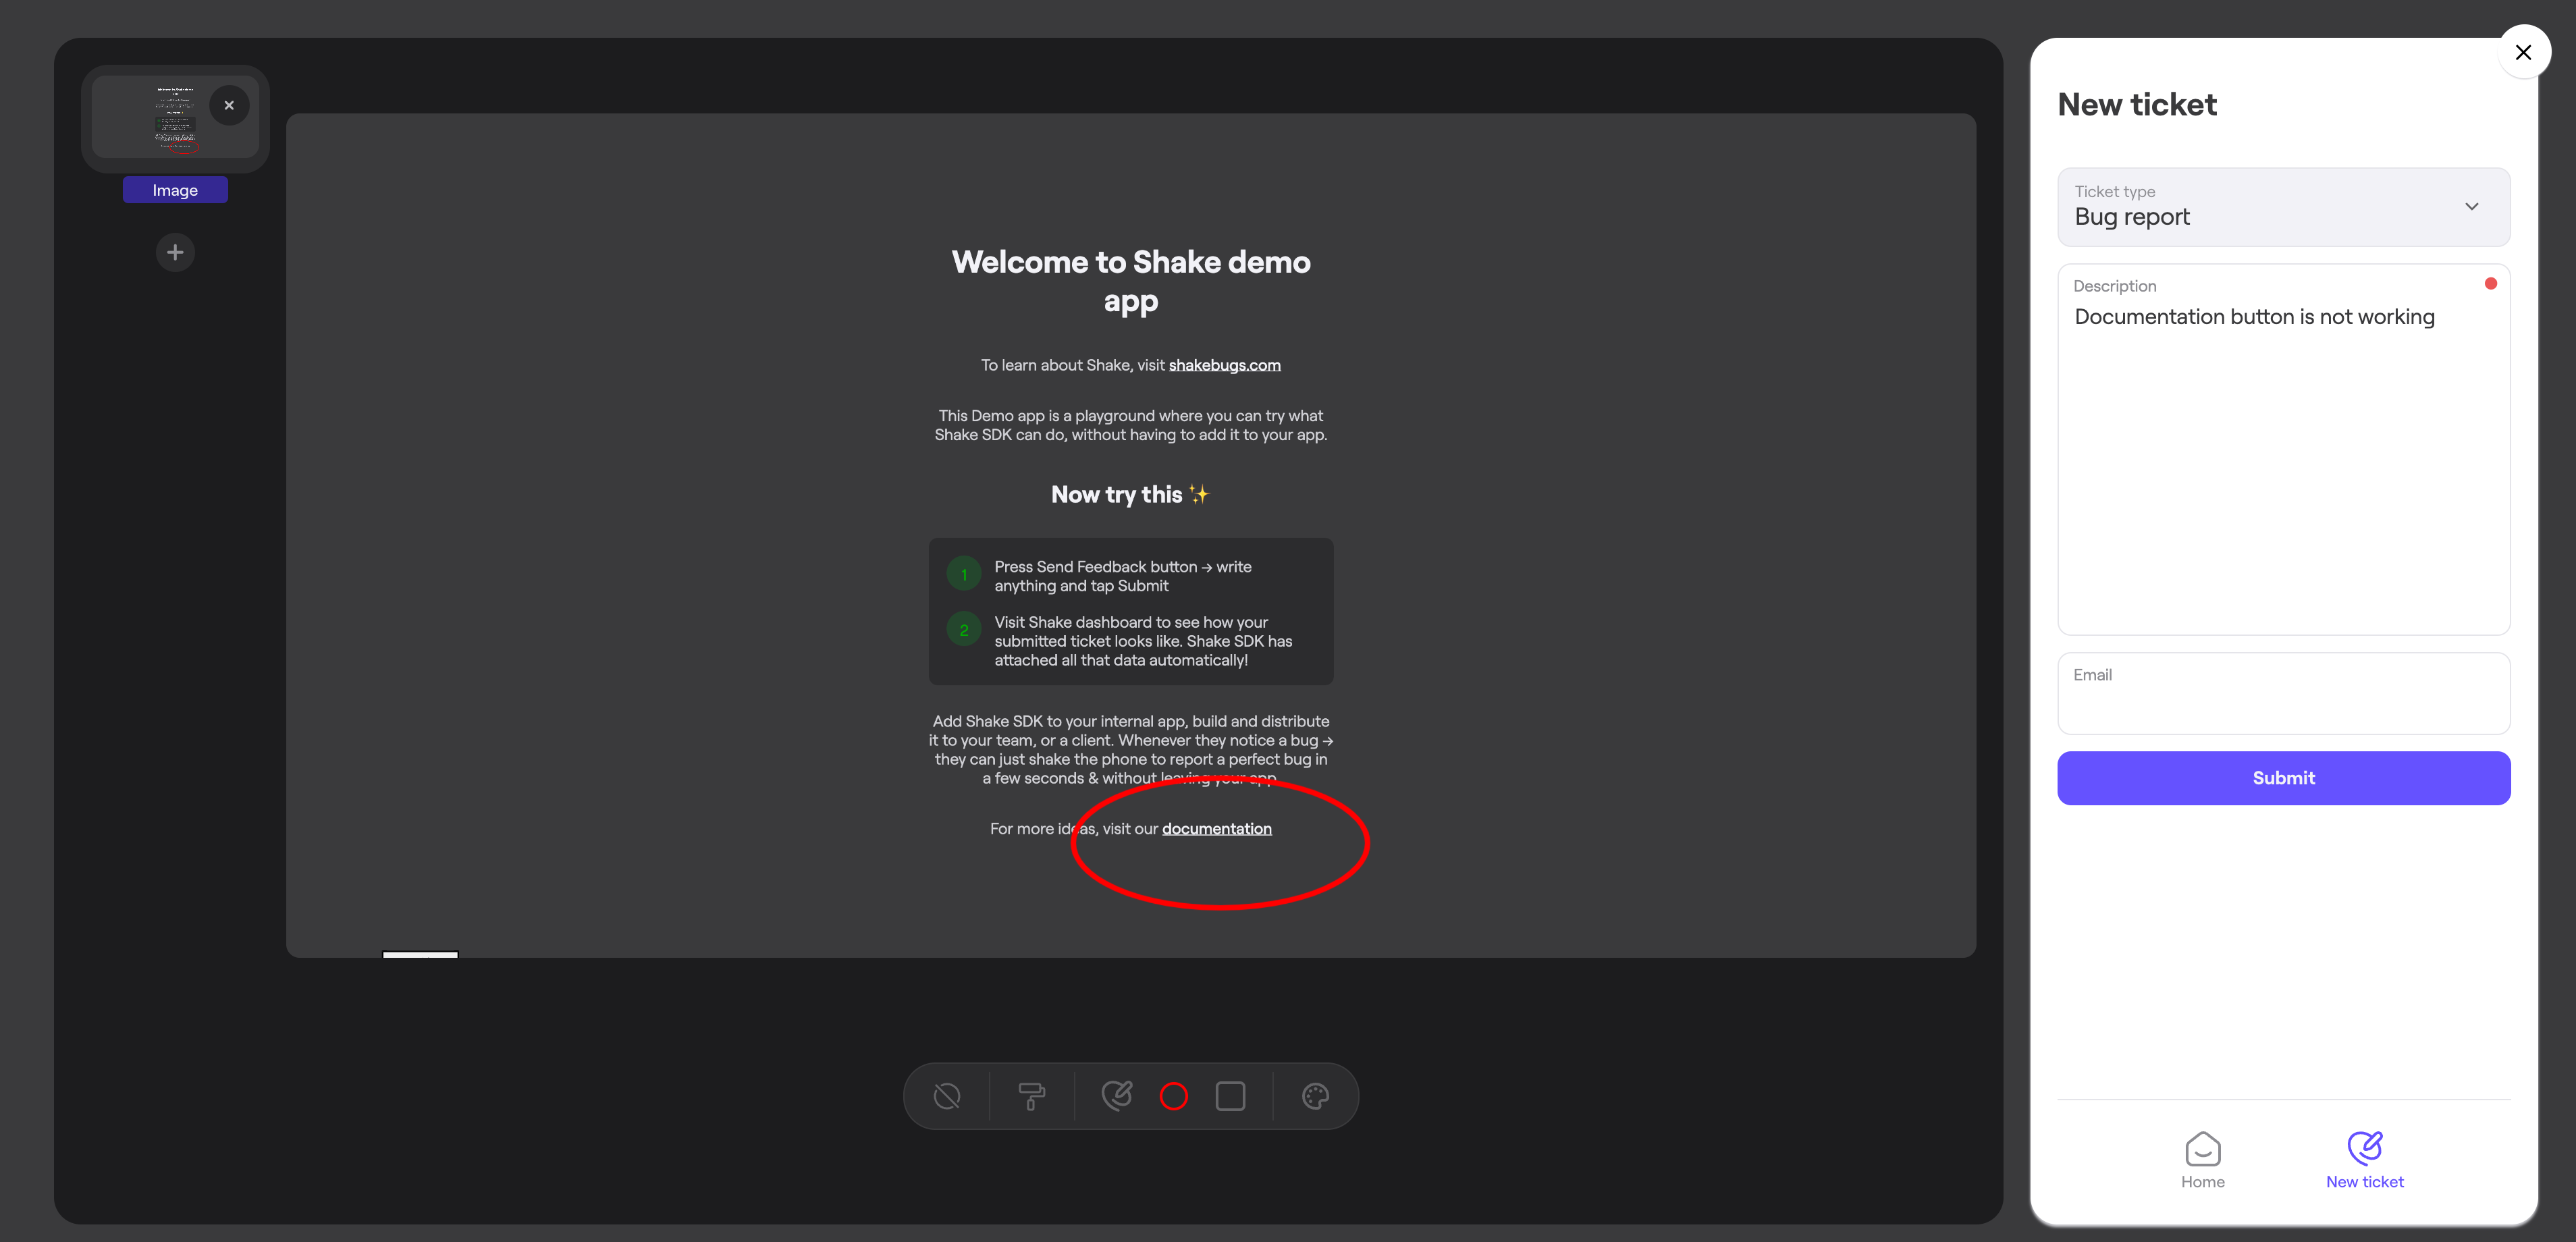
New ticket
Used to provide additional details about the user feedback. For example - description and file.
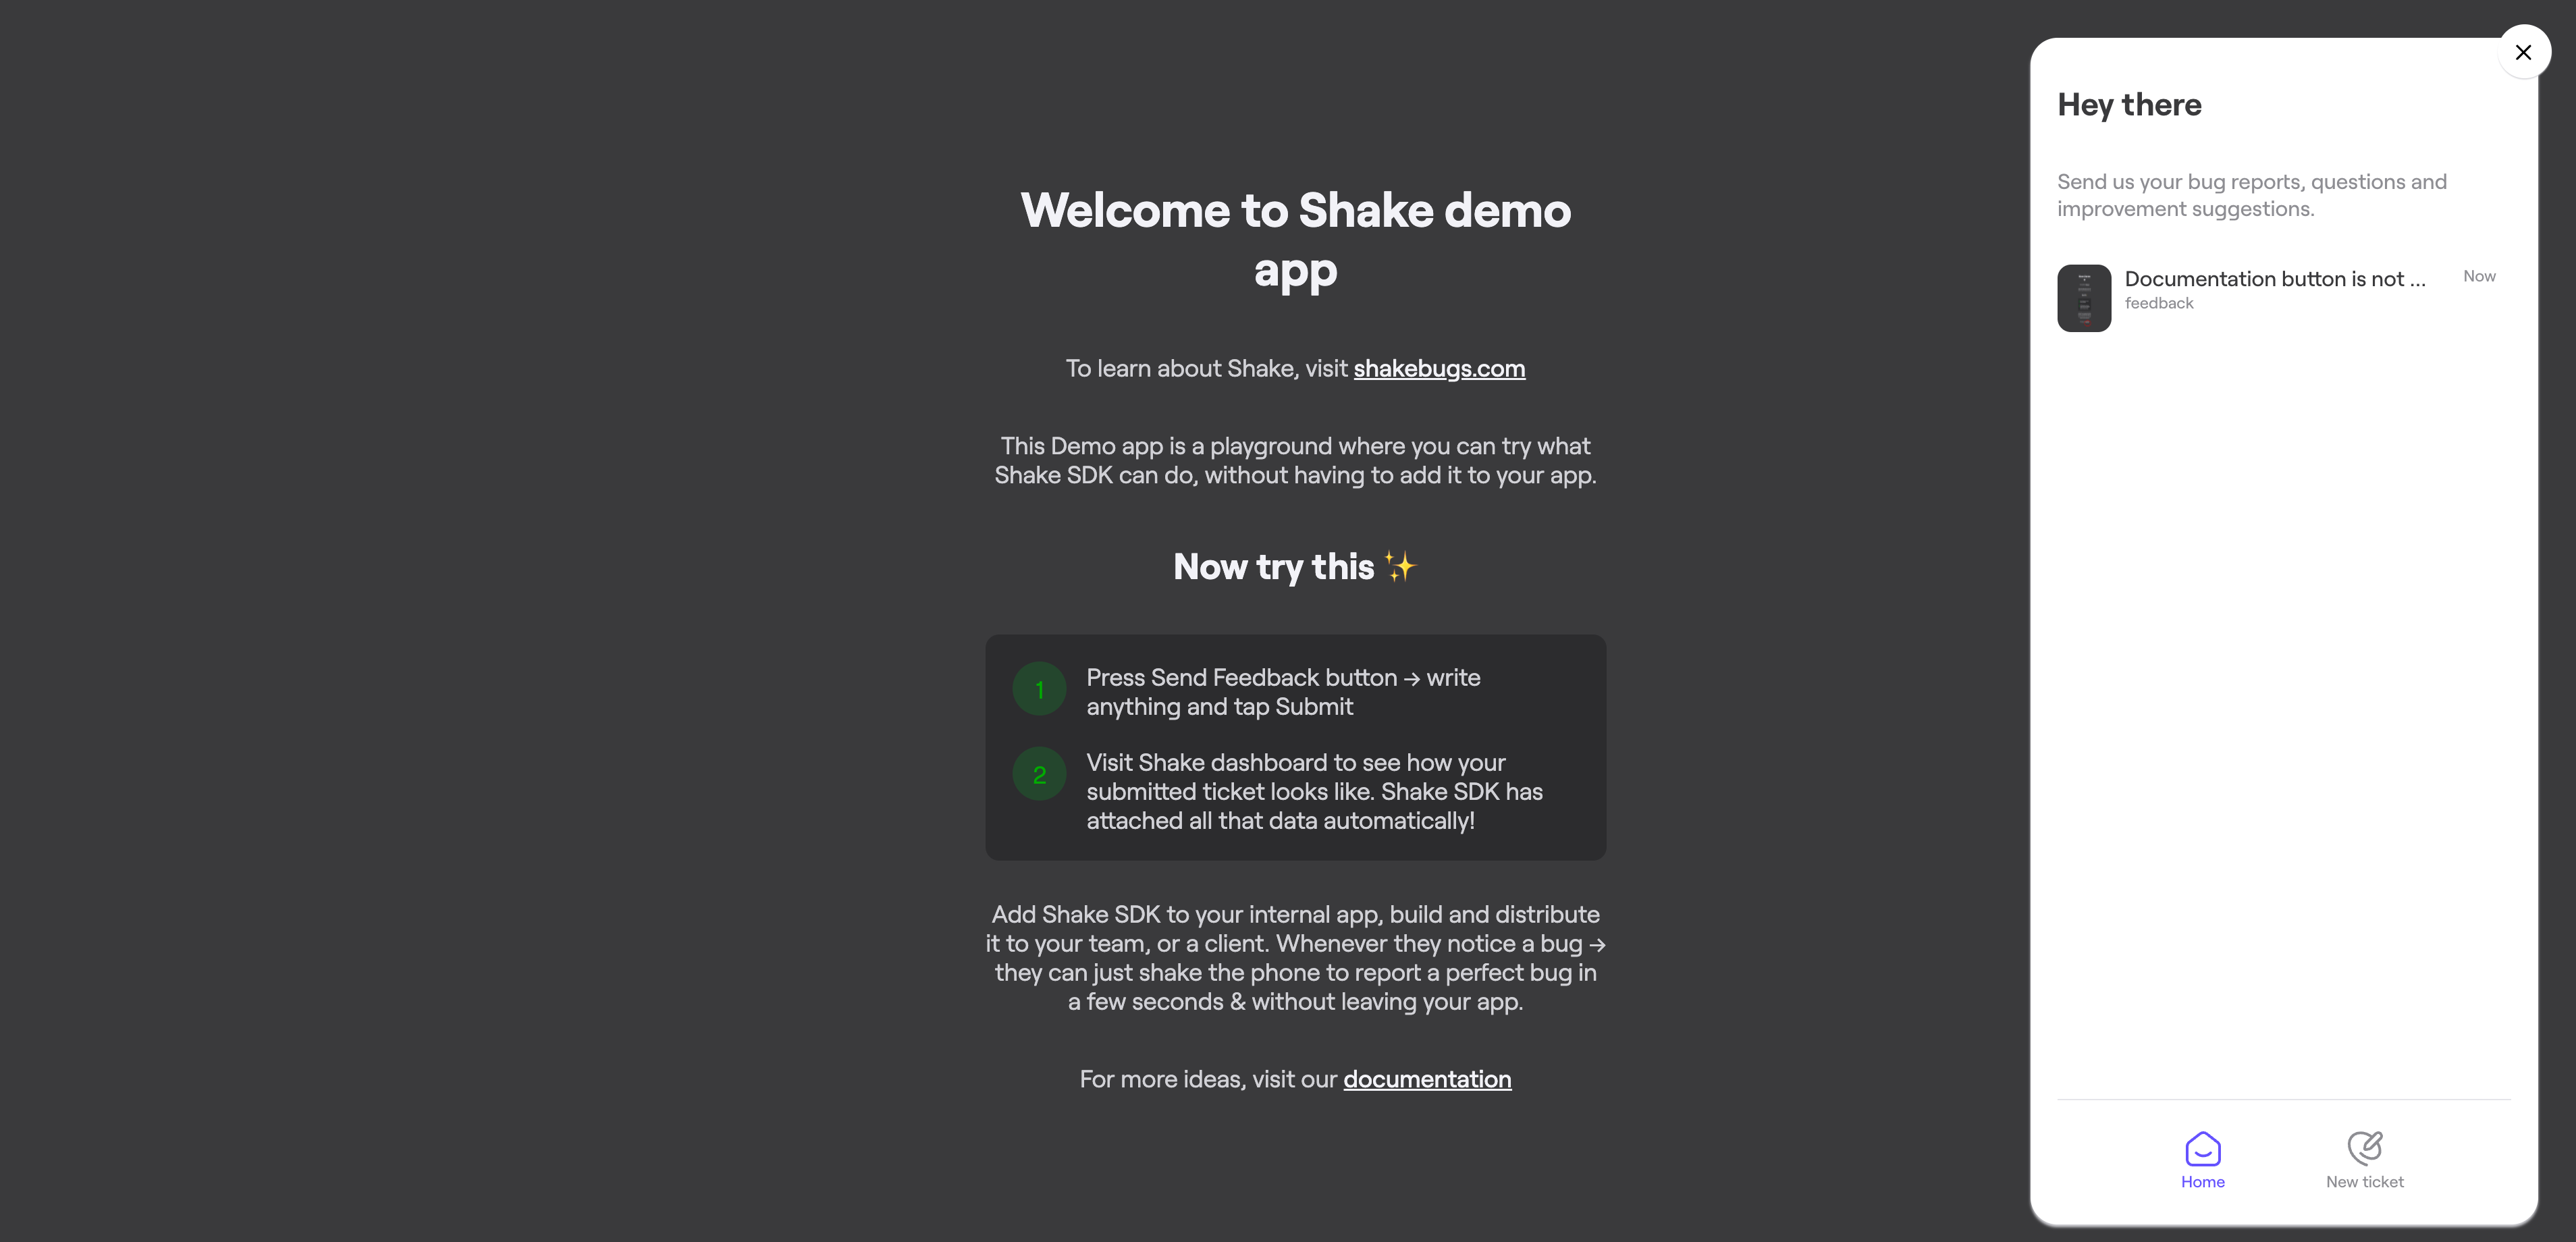
Home screen
Central place for registered app user where all user tickets are listed.
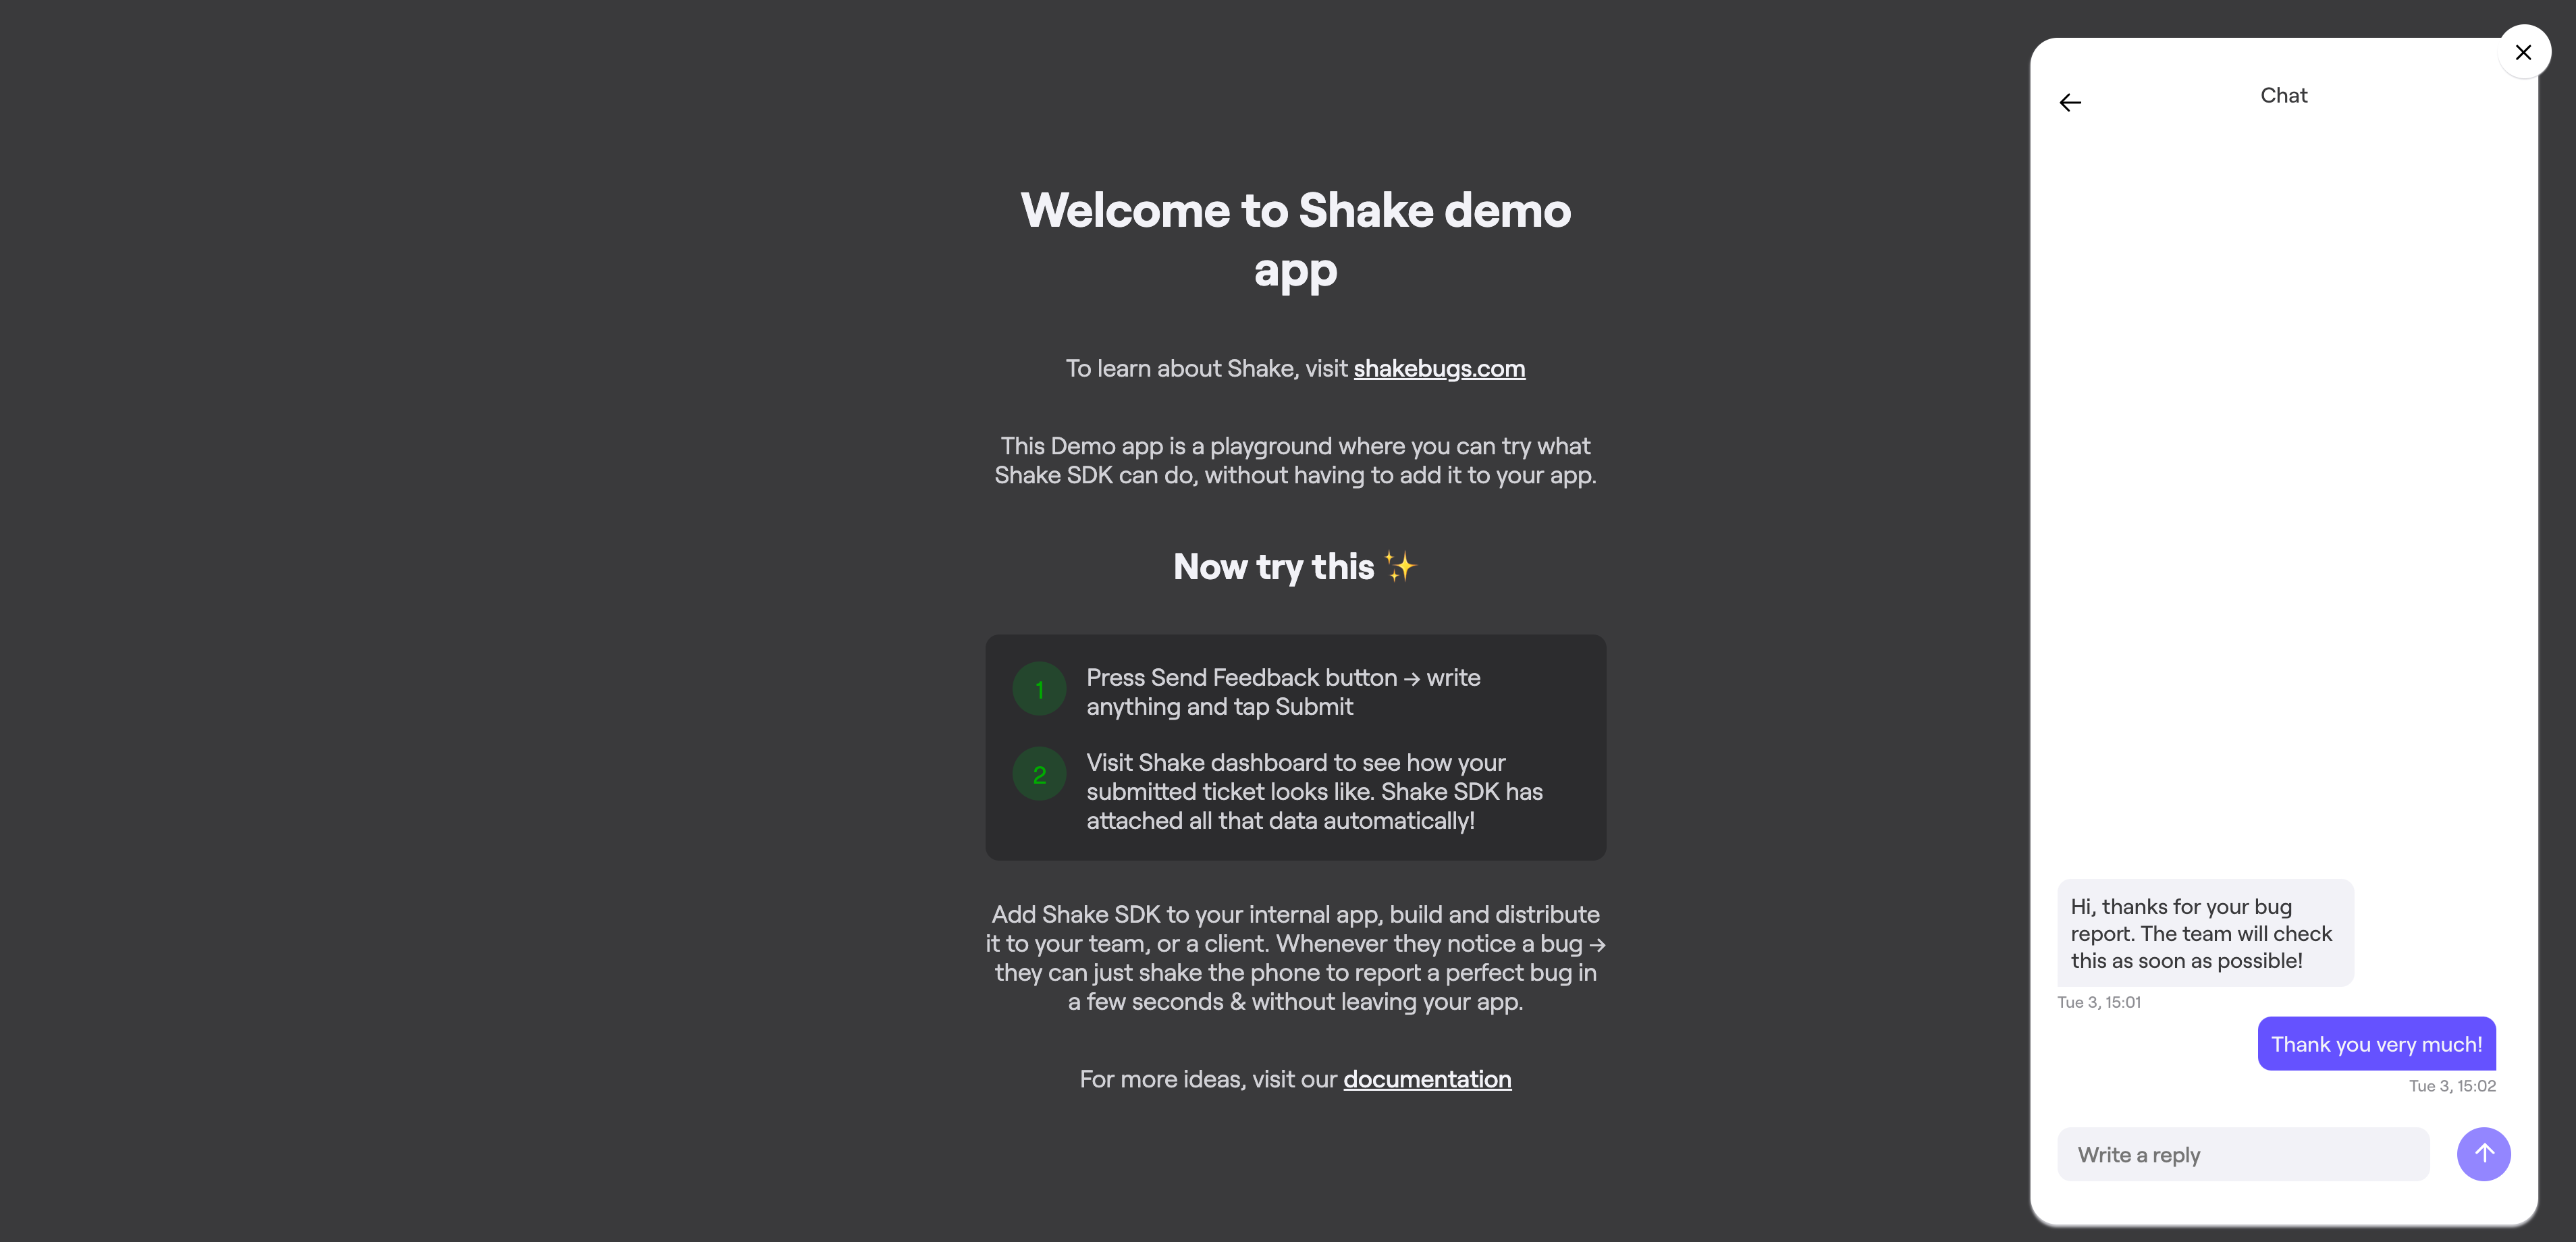
Chat screen
Used to chat and provide more details to the Shake dashboard users.
Opening Shake
You can decide to open Shake screen either using default floating button or from the code, depending on the flow you want to achieve. Listed below are some common use cases that show where you might like to add Shake to your app. Of course, it's up to you to decide what best suits your app UX.
Internal feedback collection
This entry point is often used during internal testing. Your testers or office colleagues are told to invoke Shake whenever they notice a bug or have a suggestion. In this case, you'll probably want to use default floating button to open Shake. You don't need to code anything, the button is available after Shake is initialized.
Production ticketing system
In production, apps usually add Shake under My account or Settings → Help. There, they have a Submit feedback button that opens Shake's screen. In this case, you'll want to show Shake when a button is clicked.
For more details check how to invoke Shake.
Mobile design
Shake UI is build completely with responsive design on mind. It means that it will automatically adjust its user interface to the screen resolution it is used on, both for mobile and tablet devices.